Getting Started with 3D Printing Software TinkerCAD
- Chris Wong
- Dec 6, 2021
- 2 min read
Updated: Dec 19, 2021
In this post, I will walk you through all the basics of TinkerCAD you need to master so you can be ready to go. You will learn how to set up an account, use the navigation panel and tools, and how to make full use of all the free tutorials on its website. Autodesk TinkerCAD is a fantastic, free and user friendly online 3D design application.
I have in multiple occasions mentioned that Tinkercad is a great starting point if you have been wanting to design your own 3D printed object. Advanced modelers may prefer programs like Fusion 360, SolidWorks, and Blender, but these can have a steep learning curve. If you are looking to design your own 3D printed object in a modeling software, Tinkercad can get you there in no time.
Now if you have 9 minutes to spare, watch the video below:
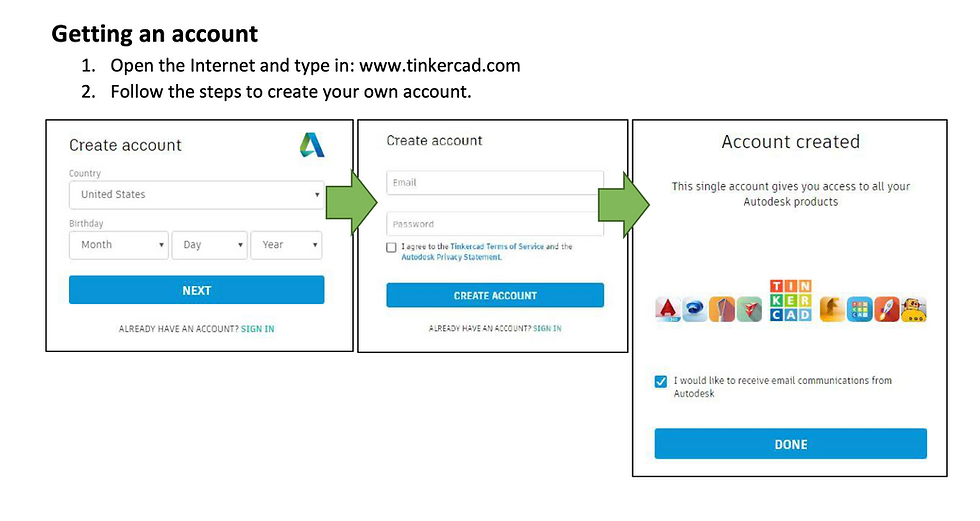
To sign up an account
Let’s go to Tinkercad’s website and follow steps below to sign up:

After creating an account or logging in with your Autodesk account you can access the browser-based app. It’s now time to discover the Tinkercad interface! You can do the first tutorial that Tinkercad will automatically show you – it’s recommended if you have never used a 3D modeling software.

To use free lessons
There is no need to worry over where to start or what tools to use. TinkerCAD has got you covered. Click on "Learn" on the upper right menu and you will be guided into the page below:

I always recommend doing the Starters first. It takes roughly 15 minutes or so, definitely worths your time. You'll learn how to use the tools and to control with keyboards through a couple of practice.
After finishing the Starters, you're free to design your own project according to your creativity. Don't worry about mistakes and failure. Those experience help you grow fast. You can also try the Lessons section to tone your skill. The Projects might be challenging for beginner. Save that until you're more skilful.
Comentarios